Tuesday, December 28, 2010

Potato Salad

Potato Salad

Potatoes, boiled
Onions, chopped
Eggs, boiled and diced
Celery, chopped
Pickles, chopped
Miracle whip
Mustard (Prepared yellow mustard)
milk
pickle juice
Dill relish (Optional if you have pickles)
Salt
Pepper
Paprika

Potatoes, boiled in their jackets
 Boil the potatoes in their jackets. Start with Cold water. You may boil the eggs in the same pot at the same time, but add them on top of the potatoes. Remove the eggs after they have boiled for 18 minutes. (Place the hard boiled eggs in cold water. As they cool, peel, rinse and chop)

Once the potatoes are "fork tender" (A fork inserts easily), drain them. Remove their skins. Chop coarsely, add to a large mixing bowl.
Skins removed, coarsely chopped
Add the chopped onion, celery, pickles, and eggs.
Ingredients for the dressing
 While the potatoes are still warm, add the dressing:
Dressing
Mix 2 cups of Miracle Whip Salad Dressing, 1/2 cup milk, 3 tablespoons pickle juice, 1/4 cup pickle relish, and 3 tablespoons of yellow mustard. Whisk together. Pour over warm potato mixture. Blend thoroughly.
Salt and pepper to taste.
Refrigerate.
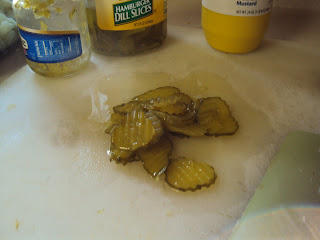
Pickles, ready to chop


Finished Potato Salad, sprinkled with paprika for color
Sprinkle lightly with paprika before serving.
Serve Cold.

Monday, December 27, 2010

The Easiest Peppermint Bark

This recipe brought to you by Rose!

Place several unwrapped peppermints into a gallon-sized Ziplock Freezer bag.
Break them to bits inside the bag.
Lay the bag flat in your microwave.
Place four squares of almond bark in the corners of the ziplock bag. (INSIDE the bag)
Microwave until the almond bark is just melted..
Remove the bag from the oven, and work the peppermint bits into the almond bark. (You may need a few seconds longer in the microwave if the almond bark isn't quite melted enough..)
Pat the bag out more or less flat.
Toss into the freezer for 5-10 minutes. (Until the bark is firm again)
Remove bag from the freezer.
Whack it hard on the counter to break the candy into pieces.
Pour into your serving dish.
(Picture might be added later!)

Thursday, December 23, 2010

Vanilla Sugar

Vanilla Sugar

1 vanilla bean pod
Granulated (white) sugar
1 sealable canister

Bury the Vanilla Bean in the Sugar
Take one vanilla bean pod and bury it in a canister of sugar. Seal canister. Let set several days before using. Replenish sugar as it is used, until vanilla bean loses its potency (I was told six months or so.)

What is vanilla sugar? and why do you need to make some?
I heard about Vanilla Sugar and got this recipe from a fellow blogger. The blogger swore using vanilla sugar in cookie recipes would dramatically improve their already incredible taste.
So a few weeks ago, I got a vanilla bean from Sprouts .I buried it in my sugar. Today I made cookies. Regular old chocolate chip cookies made from the recipe on the back of the package... except I used vanilla sugar in place of the plain sugar.
Oh. My.
Really. You need some vanilla sugar.

OK. Let me just state a few things for a few people who didn't totally grasp the concept here. No, the bean does NOT grow in the sugar. The sugar just absorbs vanilla essence. There is no set amount of sugar you can transform... just keep replacing sugar as you use it until you notice it isn't quite living up to the goodness that started you using this. Then scrape out the seeds and use them in a recipe calling for vanilla, and put a new bean in the canister.

Wednesday, December 22, 2010

Peanut Butter Cherry Cups

Peanut Butter Cherry Cups

Peanut Butter Cherry Cups
My own take on the famous peanut butter cup!

Dark chocolate chips
3/4 C. Crunchy peanut butter
2 TBS melted butter
1/4 C powdered sugar
1/4 C maraschino cherries, drained (without stems)
mini baking cups (found mine in WalMart right next to the regular/cupcake baking cups)


Spread out mini baking cups on a platter or pan- preferably one with a lip so they don't slide off as you carry this to the fridge later!

In a food processor, blend everything EXCEPT THE CHOCOLATE CHIPS, until well mixed and the cherries are ground up.

If you have a pastry bag, put the mixture into the pastry bag. If you do not have a pastry bag, (I am assuming you do not!)  place a sandwich size ziplock bag into a mug. Fold the top of the bag down over the top of the cup, so that the cup is holding the bag open for you.

Repeat with a second bag and cup.

Scoop the filling into one bag.

Now, in a microwave safe glass bowl, OR in a double boiler, melt the chocolate chips, stirring frequently.

Transfer the melted chocolate to the second ziplock bag.

OK... Ready? Use scissors to clip a very small corner off of your ziplock of melted chocolate. Squirt a dab of chocolate into the inside bottom of each of your mini baking cups.
(I specify INSIDE bottom, since the time when I first was teaching the boys to bake and told them to grease a pan while I went potty. I reminded them to be sure they got the bottom of the pan real good. When I returned, they had greased the pan real good... inside and out! They were especially proud of the nice thick layer of shortening on the bottom (outside) of the pan... But I digress.)

You will only want to use about 1/3 of your total melted chocolate in doing this.

Set the baggie of chocolate aside in a manner that it will not leak all over everything....

Now, clip the corner of the bag of peanut butter/ cherry filling.

Squirt a good dab of filling into each of the baking cups.

Grab your bag of melted chocolate and cover the peanut butter filling with more of the chocolate... hopefully sealing the filling into the lower layer of chocolate.

If desired, sprinkle with a few grains of course sea salt.

Refrigerate until firm.

Store in a sealed container in refrigerator.

Tuesday, December 21, 2010

No Bake Cookie Treats

No Bake Cookie Treats

These ugly cookie/candy treats are love at first bite for most people. TRY them!

1 package of Oreo (type) cookies (36-48 cookies)
1 8oz. package Cream Cheese
1 to 1 1/2 package(s) Dark Chocolate Chips
1 tsp paraffin (1/2" cube)

Dampen a cookie sheet or platter- the damp helps hold the wax paper in place. Spread a sheet of waxed paper onto the cookie sheet. Set aside.

In a food processor, grind the cookies to crumbs. They will be sort of gooey due to the filling.

Add  the package of cream cheese to the crumbs in the food processor. It blends more easily if you break the cheese into chunks. I did NOT soften the cream cheese first.
Blend  the cream cheese and cookie crumbs into a nasty looking paste.

Using a small cookie dough scoop, or a teaspoon, drop the paste onto waxed paper. I try to form the paste into ball shapes- or at least a semblence of round. If the paste is too sticky, place in the freezer for 10 minutes.

Once your paste is all formed into balls, or your first cookie sheet is full... place the balls into the freezer for 20 minutes. (Continue to make the paste into balls on a second sheet if necessary.)

My "double boiler"
While the freezer firms up the balls, set up a double boiler. A double boiler can be rigged by placing a glass (or metal) bowl over a saucepan with an inch or so of water boiling in it.. You want the bowl to fit partly into the mouth of the saucepan and seal it, keeping the steam sealed in the saucepan.

Melt the paraffin first, in the bowl of the double boiler- then add the chocolate chips. Stir as they melt. Turn the heat OFF to avoid steam burns. The hot water will keep the chocolate melted.

Using toothpicks, dip each of the balls into the melted chocolate, rolling to coat... then plop them back onto the waxed paper.

When all of the balls are coated, return to the freezer for 15 minutes.

Store, covered, in the refrigerator.

Try substituting Oreo Mint Cookies; or a few Andes Creme de Menthe candies in the chocolate. I have used milk chocolate chips, but pretty much everyone likes the dark chocolate best. I found a store brand of sandwich cookies that had bits of ground peppermint in the filling- that is what I used this time. this batch also has the milk chocolate, because the store was out of dark chocolate.


Friday, December 17, 2010

Grilled Cheese Sandwich

Grilled Cheese Sandwich


I started with thick slices of a "designer" sourdough bread.
Melt butter on your skillet. For added zest, add a bit of chopped jalepeno and some garlic to the butter. Dredge the bread through the butter,
When the first side is all goldeny deliciously browned and crunchy, turn it face up and....
Pile on your favorite shredded cheeses. Pile good and high! I sprinkled mine with chili powder.
Turn the already browned side of the second piece of bread down over the cheese.
Add more butter to the pan if necessary....
As one side browns, turn over carefully and cook the second side. Dredge it around to get all that remaining butter....
Ready to serve when both sides are golden brown and the cheese is all gooey and melty....
Serve with  a big bowl of tomato soup... and a tossed salad if you want a "complete meal".

High in fat, calories, and comfort.

Wednesday, December 15, 2010

Chicken Fajita Alfredo


Chicken Fajita Alfredo

Cubed Chicken Breast
Chopped Onion
Chopped Bell Peppers
Half and Half (Dairy product in milk section of grocery store) OR
Heavy Cream
Parmesan Cheese (grated)
Asiago/ Romano cheese (grated)
olive oil
Garlic (minced... substitute powder or granules if necessary)
Cooked pasta (Spaghetti noodles, Amish style egg noodles, fettuccine... whatever you have)
Salt and Pepper to taste

Start your Pasta water to boil!
(The Alfredo sauce doesn't take long, so time the pasta to finish within 15 minutes of starting the sauce.)

In a heavy skillet, cook the chicken in a small amount of olive oil.

Push to the side or remove the chicken, add the onions and peppers to the skillet (Add a bit more olive oil if necessary.)

Add the garlic when the onions and peppers are about half cooked. (Unless you use powder/ granules, then add with the Half and half)

Cook the onions until tender/ clear. (Or caramelize if you prefer)

Drain any remaining fat/ oil from the skillet. (I often just blot it out with a paper towel.)

If you removed the chicken, add it back to the skillet at this point.

Reduce heat to medium low.

Pour in  your Half and Half (or heavy cream). I usually figure about 1/2 to 2/3 cup per person... err on the more side for this recipe!)

As the half and half heats, add your cheeses.  (I add about 2 to 3 cups total to feed 6 people.)

Stir the cheeses in, allowing to melt.

Heat thoroughly

Do not boil the sauce.

If the sauce is too thin... you have 2 options: Add more cheese; OR mix/dissolve a tablespoon of cornstarch in 1/4 cup COLD water. Boil in microwave for 30 seconds to 1 minute, then stir into the sauce, mixing well.

Serve over pasta!

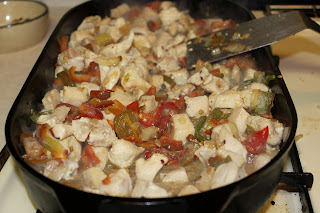
Chicken
Cooking in a heavy skillet

Ready to serve!

Kimber Approved for Tastiness


Wednesday, December 8, 2010

Enchiladas

Enchiladas

Enchilada sauce
Condensed Tomato soup
Nacho cheese soup (optional!)
Ground pork
Ground beef
Shredded cheese
Tortillas


The ingredients

Browning the ground meat
Mixing the sauces

Stir the meats together as they brown
Add sauce to the greased casserole dish

Add some sauce to the meat
Enough sauce to make it moist, but not soupy

Tortilla on a plate, ready to construct the enchilada

A line of ground beef on the tortilla
Sprinkle with cheese

Roll tightly

Place in the sauce in the casserole dish
One down, fill the pan

Seams down, press snugly together, squishing a bit of sauce between
Pour the rest of the sauce over the enchiladas

Spread the sauce with the back of a spoon
Sprinkle with cheese
Bake at 350* for 25- 30 minutes, until hot and bubbly!

Serve with a delicious tossed salad
In a heavy skillet, brown the ground meat.
While the meat browns:  mix together the enchilada sauce, tomato soup, and nacho cheese soup... all straight from the cans, undiluted.
Grease a casserole dish. (I use pan spray)
Add some sauce mixture- enough to cover the bottom of the casserole pan.
Place your cheese(s) in a bowl for easier access. (I mix mozzarella and co-jack shreds)
Drain the cooked meat.
Add some sauce mixture to the ground meat, enough to make it nice and moist, but not soupy.
Place a tortilla on a plate.
Add a scoop of ground meat.
Sprinkle with cheese.
 Roll tightly.
 Place seam side down in the sauce in the casserole dish.
Repeat the steps from "Place a tortilla on a plate" to this point, until your pan is full.
Snug the filled tortillas close to one another, rolling slightly to get a bit of sauce between the enchiladas.
When the pan is full, pour remaining sauce mixture over the enchiladas.
Spread with the back of a spoon.
Sprinkle with shredded cheese.
Bake at 350* 20- 35 minutes... until hot and bubbling.
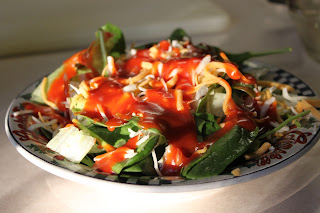
Serve with a tossed green salad. (The salad in the picture is dressed with Catalina dressing, NOT enchilada sauce!)

Monday, December 6, 2010

Sausage Gravy (and biscuits)

Sausage
Flour
Cooking oil
Salt
Pepper
Milk
Biscuits (I used frozen, ready to bake today!) Prepared according to package directions.


Brown sausage in the heavy skillet, crumbling as you go. (I had very little sausage this morning, so it was more like sausage-flavored gravy!) Scoot the sausage to one side of the skillet when done.
browning sausage


Add 3 tablespoons of cooking oil to skillet. add 1/2 cup flour to the oil, and 1 teaspoon of salt. Pepper as desired.
Adding salt to the flour for roux


Stir the flour into the oil, keeping this part of the skillet over the heat.
browning the roux

Biscuits! (NO they are not burned, they are golden perfection!)


Stir the sausage into the browned roux.
Stirring the sausage into the roux


Add milk to the skillet, all at once, or at least in a continous stream, stirring as you go. This prevents lumps.
Cook, stirring contantly, over medium heat, until the gravy thickens.
adding milk to the roux

Stir as you go!


Add more milk if the gravy is too thick.
adding more milk


Serve over crumbled biscuits.
Serving the kids

Sunday, December 5, 2010

Vegetable Beef Soup

Vegetable Beef Soup

Small round steak
Potatoes
Carrots
Onion
Celery
Turnip
Tomato Paste
Bay leaf
Thyme
Barley
Garlic
Better Than Bullion beef soup base
Olive oil

Trim all visible fat from a partially thawed round steak. Cut into cubes.

Add 2 Tablespoons of olive oil to a heavy pot, turn on medium heat.

A small round steak, partially thawed

Then, Cubed
Add the cubed steak into the heated olive oil.

WASH YOUR CUTTING BOARD AND KNIFE!


Into the heavy pot over meduim heat, in 2 Tablespoons olive oil


While the beef sears, chop your onion and celery . (I had some chopped celery already in a bag in the freezer).

Olive Oil, onion, bag of frozen copped celery


Add the chopped onion and celery to the beef, stirring to turn beef.
The celery and onion (now chopped) added to the searing meat in the pot


Next, wash and pare your carrots. I did not pare my potatoes, I just cut them up. They may be pared if you prefer.
Potatoes, pared carrots (both chopped) and "Better Than Bullion- Beef"

Rinse your turnips and cabbage(s). Pare turnip. Chop.
Turnip, red cabbage, and green cabbage
 Add the vegetables to the pot.
Add water to cover 1 to 1 1/2 inches over vegetables.
The turnip (pared and chopped), and chopped cabbages
 Add barley- 1/4 to to 2/3 cup, depending on how well you like barley!
Barley (I really prefer pearled, not "quick"!) Thyme, bay leaf, and another shot of the "Better than Bullion"


Add tomato paste, garlic, bay leaf, and thyme. (1/2 tsp thyme)
Water, tomato paste, and prepared minced garlic
 Stir.
Simmer until all vegetables are tender. You may simmer covered or uncovered. If you simmer uncovered, keep an eye on the level of liquid.
Simmering soup
REMOVE BAY LEAF BEFORE SERVING!

Salt and Pepper to taste.